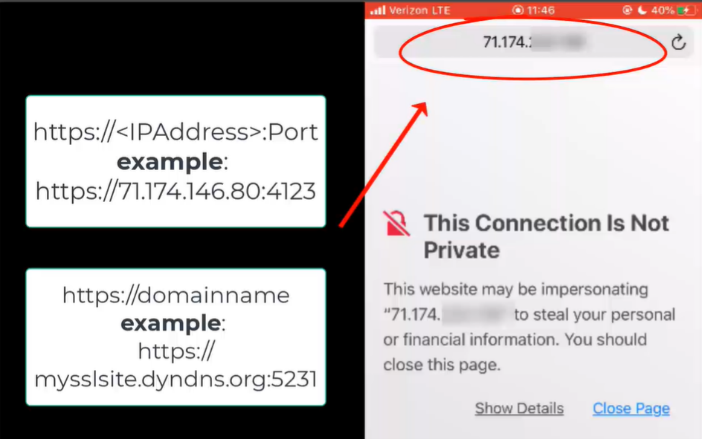
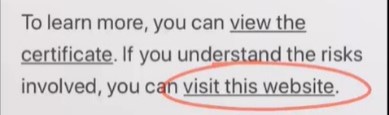
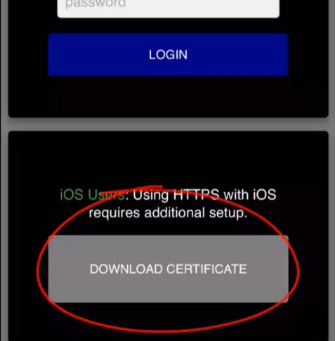
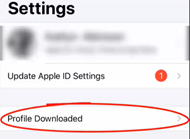
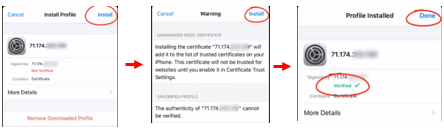
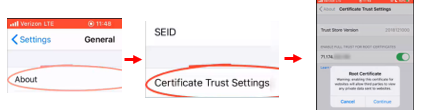
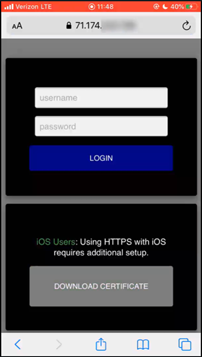
By ViewCommander Tech Support / April 19, 2021 Installing SSL Certificate on iPhone **NOTE: Prior to completing these steps a Self-Signed SSL Certificate must have been created in ViewCommander SEE THESE NOTES OR THIS VIDEO TUTORIAL**For a Video Tutorial on Installing SSL Certificate on iPhone click here 1. Enter IP Address or Hostname followed by the port number into your web browser on your iPhone. 2. Click “Show Detail” and scroll to click on “visit this website” 3. Click “Download Certificate” and “allow” the website to download the configuration profile. 4. Within the iPhone settings click on the “Profile Downloaded” 5. Click “Install” in the top right corner, enter the iPhone passcode and click “install” again to finish the installation. 6. To enable the profile, go into “About” and scroll down to “Certificate Trust Settings” and enable full trust for root certificates”. 7. Go back to the web browser, refresh the page and enter the username and password, the same credentials used to access ViewCommander via a desktop