The Control Configuration Panel gives you advanced controls for your camera including presets. NOTE: This page depends entirely on your camera model and its capabilities. Your Control Configuration Panel may have more/less options.
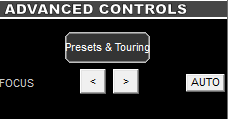
Advanced Controls
Here is where you are able to adjust additional advanced features for your specific camera model. You may see “Auto Iris”, “Focus” and more.
Presets & Touring
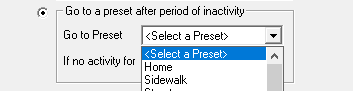
Under “Presets & Touring” you can set the camera to go to a Preset automatically after a specified period of time. This may be beneficial if someone is looking at the area around the camera but forgets to set the camera back to its original placement. This is also a useful feature if you set Regions of Interest in Motion Detection so the camera always goes back to the Region of Interest you previously setup.
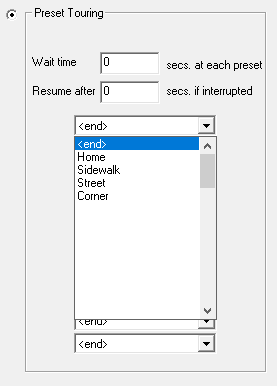
The last option is “Preset Touring”. This is where you can have multiple presets be viewed at rotating times.
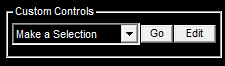
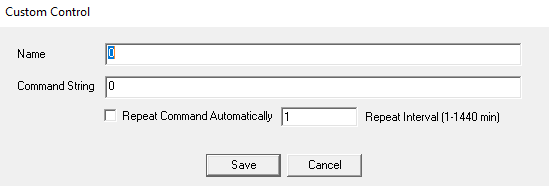
Custom Controls
If a camera has a special command, one that ViewCommander doesn’t have, you can add the command here by referring to the camera’s API documentation.
(In the ProAdvanced Version only)
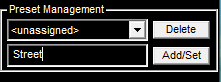
Adding/Editing/Deleting Presets
1. To add a preset move your camera to the desired location. Using the “Preset Management” boxes select an “unassigned” preset from the drop down menu and name it then click “Add/Set”.
To edit a preset choose the preset from the drop down menu and move the camera to the new desired location. Then click “Add/Set” to save changes.
(If using the web you may need to Refresh the page to see the updated presets)
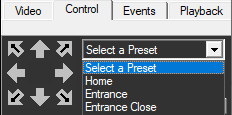
2. You should now see the presets in the drop down box. Choose one and your camera will move to that predetermined location.