Events Configuration Panel
The Events tab allows for the setting of different types of events, such as motion detection or I/O port events. You can configure ViewCommander to handle events differently for each camera.
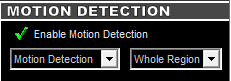
Motion Detection
This section allows different motion settings to be configured.
Checking this option will enable the motion detection system for a particular camera. Checking this option uses additional computing power to analyze the video, so leave this option unchecked unless these settings are required.
When configuring events, you can set up motion detection for both the whole image, and specific regions of interest.
In the Professional Advanced model, you can create up to 3 regions of interest per camera. In all other models, you can create only 1 region of interest.
To set up a region of interest, see the “Draw” section.
This useful feature shows where the motion is happening within the video. White pixels will be overlaid in the viewable image where motion is occurring. This is very useful when adjusting the Sensitivity setting.
This setting adjusts the sensitivity to detect motion. Choosing a low value for sensitivity will cause the motion detector to detect small changes in movement. This may be undesirable if small objects are moving in the background. Choosing a higher value for sensitivity will cause the motion detector to be more tolerant of movement in the image.
Also, network cameras may produce visual noise that may be detected on low sensitivity settings. Check the Show Motion Change box when adjusting this setting.
This status bar shows the level of detected motion in real-time. In the example, the % motion is 3.40% – which is greater than the set Threshold (see next item).
This setting determines when to take an action based on detected % motion. Setting this to lower values will trigger actions when small changes are detected (such as a bird flying by). Higher values filter out smaller objects and will trigger alarms when larger objects are detected. The arrow on this control corresponds directly with the %motion bar above. When the motion bar above passes the arrow on this control, an event will be triggered and, if setup, the camera will begin to record. See “Events and Sensors” and “Video Configuration Panel” for more information on Recording.
Checking this option will help reduce false motion detected events caused by small amounts of movement and noise that may be caused by the compressed video.
Normally motion is detected when the current video frame is compared to a video frame received earlier. In some situations, it may be better to use a base image. Selecting this option will compare the current video frame to a base image frame instead. The base frame is continuously updated and reconstructed over time.
Draw
This section allows different motion settings to be configured.
When configuring events, you can set up motion detection for both the whole image, and specific regions of interest.
In the Professional Advanced model, you can create up to 3 regions of interest per camera. In all other models, you can create only 1 region of interest.
To set up a region of interest, use the tools in the “Draw” section.
Select “Motion Detection” from the first pull-down menu.
Select the desired region from the second pull-down menu.
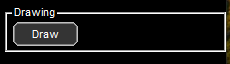
Press this “Draw” button to begin selecting the region of interest with the mouse. When pressed, a grid will be placed over the active video. Use the left mouse button to highlight an area. Use the right mouse button to un-select an area.
Select the “Wide” checkbox to highlight several squares at once. Press the “Reset” button to reset and unselect the entire window.
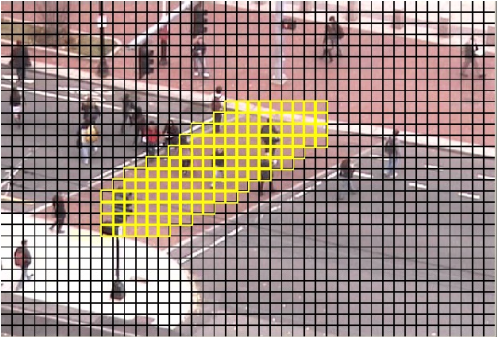
Drawing a region will look similar to the image below. In this image, only the crosswalk was highlighted.
When finished selecting the area of interest, press the “SAVE” button to save the selected area.
Sensors & Events
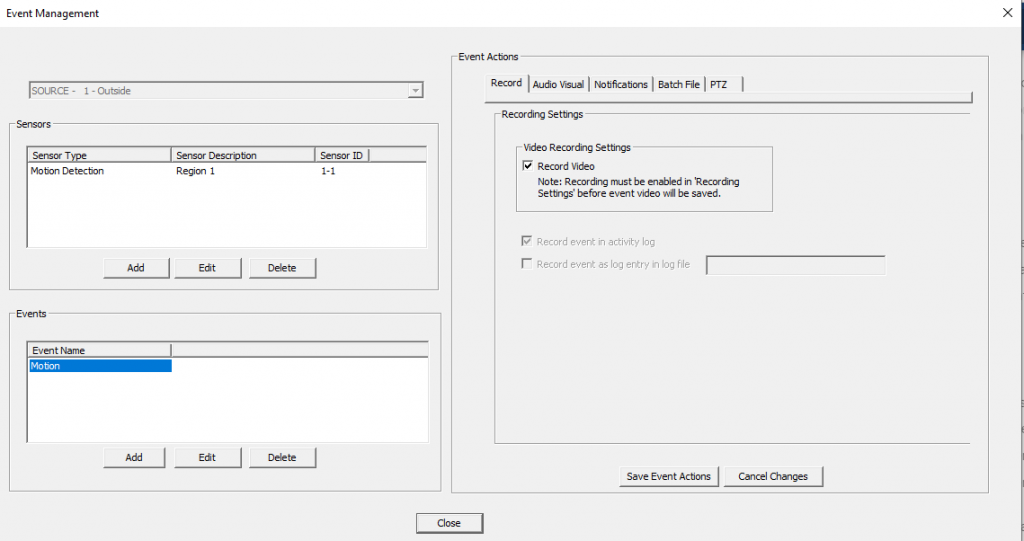
The Event Actions menu allows you to configure Sensors, Events, and Event Actions.
Sensors are used to detect specific events, like motion, connection loss, or I/O from the camera. To configure a sensor, press “Sensors & Events” then click the “Add” button in the Sensors section of the menu and select a sensor type. For Motion Detection sensors, you will also need to choose between analyzing the whole image, or a region of interest.
Each sensor can have multiple events, each with their own set of Event Actions. To configure an event, first choose a Sensor, then press the “Add” button in the Events section of the menu. Each event has a user-specified name, and can be configured to be triggered either any time or on a specific schedule. Multiple events on each Sensor can be given their own individual schedules.
Event Actions
Each Event can be assigned a number of Event Actions, which occur whenever the event is triggered. The Event Actions are grouped into several tabs for organization.
“Record” Tab
Checking this option will record video when an event is triggered.
IMPORTANT: In addition to the “Record Video” checkbox, “Enable Recording” must be checked and “Record only events” must be selected on the Video Tab.
Creates an entry in the camera’s activity log, which can be filtered during playback.
Adds an entry to the ViewCommanderLog.txt file for this event. Only some events provide this action.
“Audio Visual” Tab
Flash Box Checking this option will draw a red box around the video when an event is triggered. The Flash Box will also appear around a video feed when in MultiView Mode.
For systems equipped with a sound card and speakers, checking this option will play a sound when the event is triggered.
“Notifications” Tab
These settings determine how email notification of events will be handled:
Email will be sent for a particular event.
Set this value to wait after the event before sending the email. Useful only if the “Attach JPEG snapshot” option is checked.
This value prevents sending too many email notifications within a period of time. This value will be the number of minutes to elapse before sending another email notification.
Check this to attach a JPEG snapshot of the current video in the email.
Use this field to add email addresses to send notifications to. This will override the default system email address. Use a semicolon (;) to separate multiple email addresses.
“Batch File” Tab
This tab allows you to specify an external batch file to run when an event is triggered. You can specify both the file to execute, and a period of time to wait before running it again.
“PTZ” Tab
This action moves the camera to a preset position when the action is triggered. The camera returns to its original position after a user-defined time period.
“Other Actions” Tab
These actions are available for Timer events only. You can configure the event to activate or deactivate ViewCommander’s connection to the camera, send an email with the camera’s status, move to a preset, or set a function on the camera, such as enabling an IR filter.