This can be helpful if multiple people are logging into ViewCommander and moving the camera. This makes the camera move back to its original preset position after a period of inactivity.
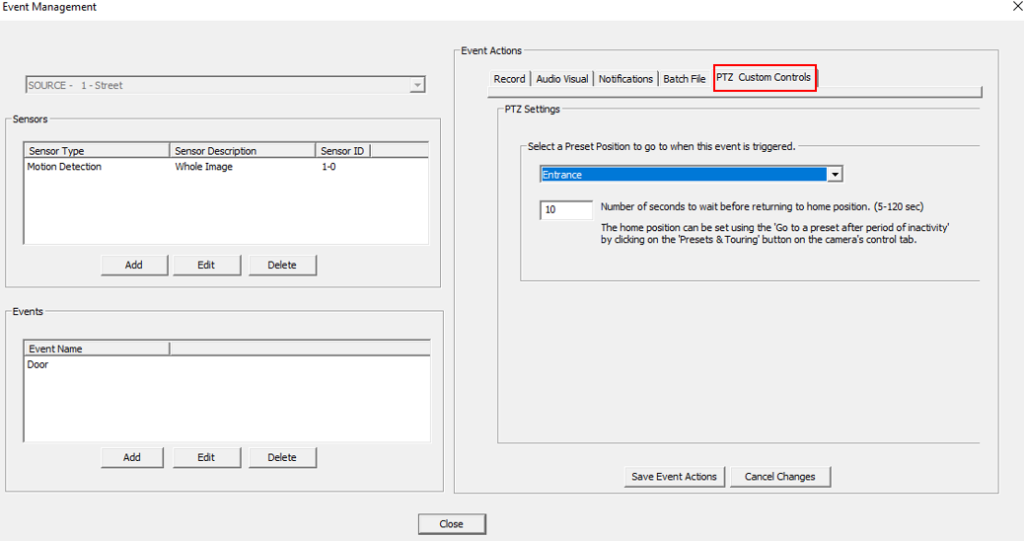
This can be helpful if a camera is looking at a whole area and a door opens. When motion is detected in that door region the camera can zoom onto the door after loading the preset.
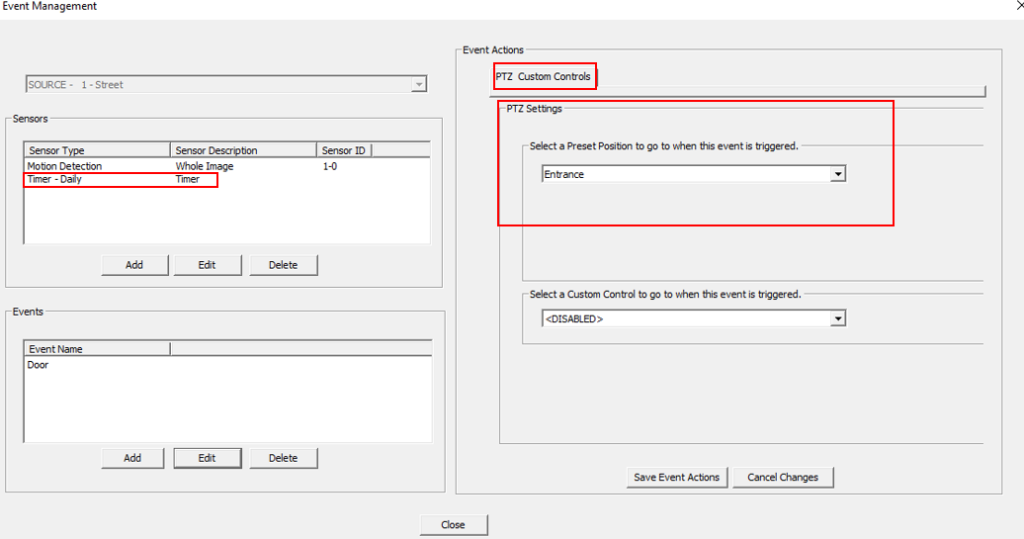
If you would like the camera to face a different way at a different time of the day.
Creating Presets
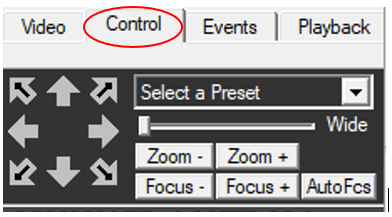
Click on the “Control Tab”
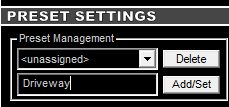
Move your camera to a location you would like to set, for example, “Driveway”.
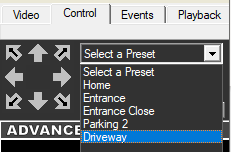
From the Preset Management dropdown choose an empty slot then give it a name. Once you click “Add/Set” you will see it in the “Select a Preset” drop down at the top.
Adding a Preset
"Select a Preset" Drop Down
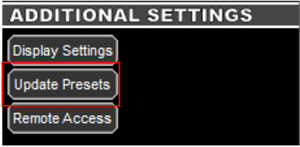
Note: For some cameras you may need to set the presets in the camera directly. When going directly through the camera itself, to get the presets into ViewCommander click “Update Presets”. Now you will see them in the ”Select a Preset” drop down.
"Presets and Touring"
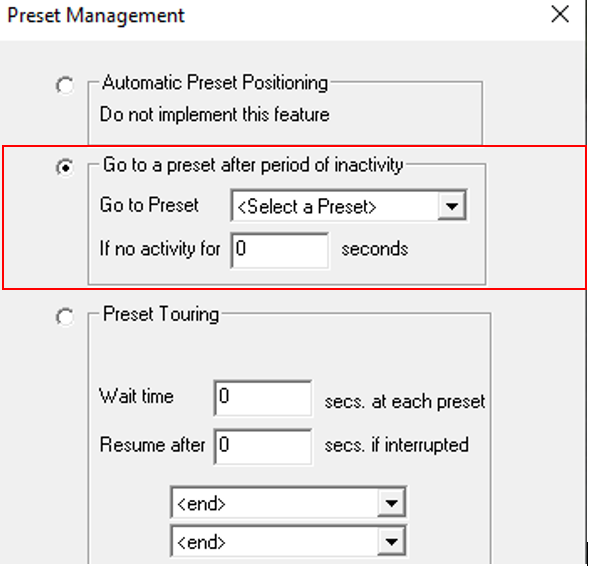
“Go to Preset after a period of Inactivity”
You can select a preset and choose how much time we want to give before having the camera move back to this preset. This is helpful if multiple people are logging into ViewCommander, moving the camera, and they forget to zoom out or move it back to its original position.
“Preset Touring”
This allows the camera to move periodically to specific locations on a cycle. The wait time is how much time you want at each preset and the “resume” field is how many seconds we want to wait before the camera goes back on the cycle.
Going to a Preset on Motion
Click on the “Event” tab then “Sensors and Events”
Here is where a preset can be added for motion detection. To learn about motion detection, click here
Click “PTZ Custom Controls” tab. This means, for example, if you have a region set for any motion detected in a doorway for ViewCommander to record, you can set the camera to zoom into the door when this is detected. If you have the ProAdvanced model of ViewCommander you can set up to 3 regions of interest.
Going to a Preset at a Specific Time
In Sensors and Events you can also have the camera point to a specific location at a specific time. This can be done by choosing the “Timer-Daily” sensor, setting your time and then the preset.