There are two tools to export video, the NVR software, and the Web Client. Within these tools there are different ways to export video depending on the situation.
These files are typically best used when exporting a few short clips. They can be played on media players such as Windows Media Player. They also can be sent via email. ASF/AVI are traditional video file formats, if you would like the most compatability for video players this is the option to choose
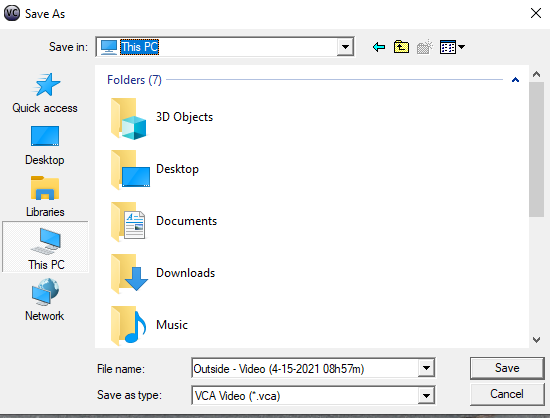
The VCA format is ViewCommander’s video format. It preserves the original image integrity, and incorporates timestamp, digital fingerprint, and other video information. The ViewCommander player must be downloaded separately to playback this file
The EXE is the same as the VCA format except it comes in a fully packaged player. You can send this export to anyone with a Windows computer and it will playback without the need to download the player.
The folder export is a raw copy of the video files as they were saved. This copies video and saves the original format and structure as it was saved on disk. Typically this is used for larger exports (hours/days long video clips).
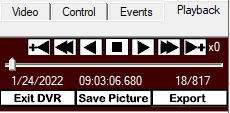
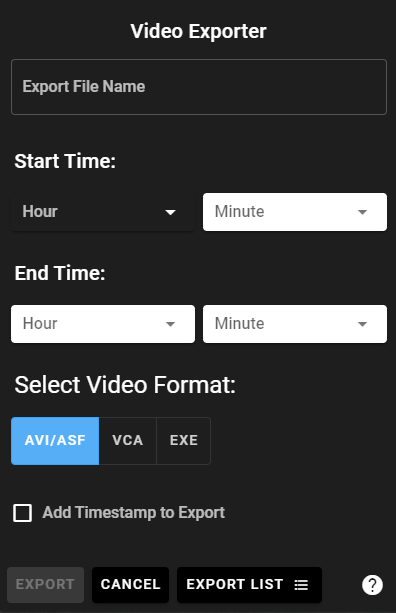
All the video exports will require a start/end time and day. If exporting a AVI/ASF format you will have a few additional options to add to the exported video.
Note: Depending upon the size of video being exported the export process may take some time
3. “Select Cameras”: Allows for multiple camera export. For a time range, choose one or more cameras to export the same time range.
4. A dialog box will open asking you to select a folder. This is where you want your archive files copied to.
Exporting within the Remote Web Access
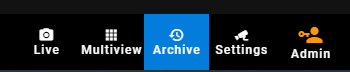
1. On the web portal select “Archive”
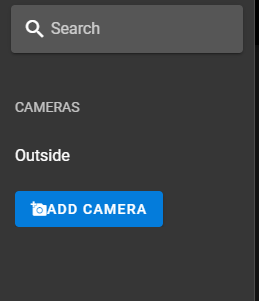
2. Select a Camera
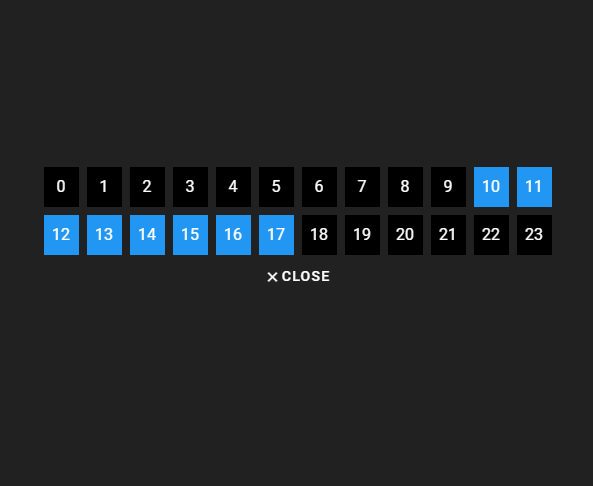
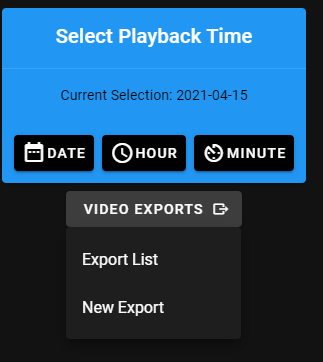
4. On the calendar select the day, time, and minute you would like to export
5. Select “Video Exports” on the right hand side of the screen –> “New Export”
6. Select the Name, Start/End Time, type of video format and the optional timestamp then click “Export”
Note: Depending upon the size of video being exported the export process may take some time
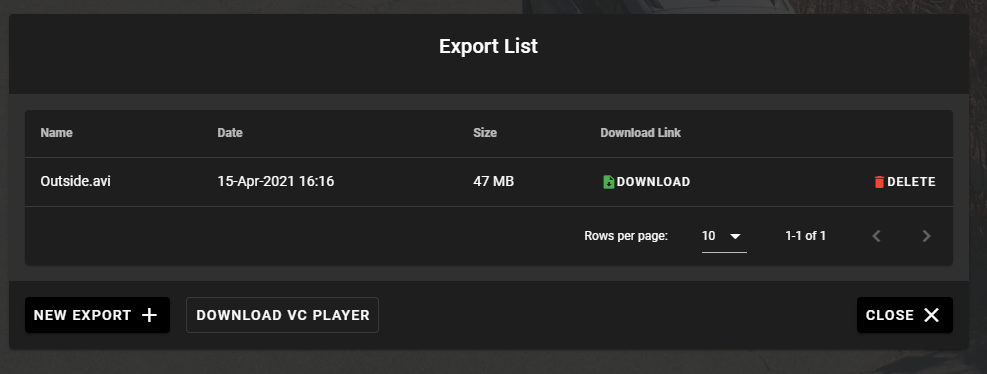
9. To view the exported video click on “Export List”