Motion Detection on the Web
The Sensors and Events allows for the setting of different types of events, such as motion detection or I/O port events. You can configure ViewCommander to handle events differently for each camera.
Enable "Motion Detection"
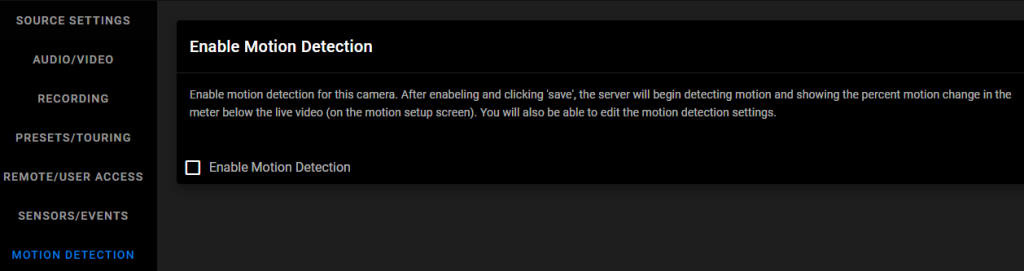
1. Check "Enable Motion Detection"
-
-
- NOTE: Checking this option will enable the motion detection system for a particular camera. Checking this option uses additional computing power to analyze the video, so leave this option unchecked unless these settings are require
-
2. Click "SAVE"

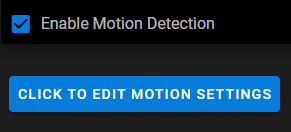
3. Click "CLICK TO EDIT MOTION SETTINGS"
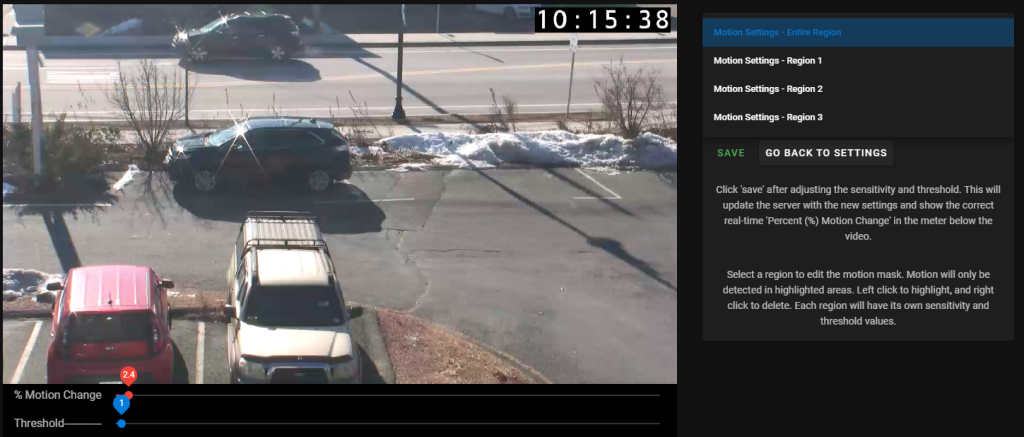
When configuring events, you can set up motion detection for both the whole image, and specific regions of interest.
In the Professional Advanced model, you can create up to 3 regions of interest per camera. In all other models, you can create only 1 region of interest. See “Brush Size” for how to draw where you would like motion to be detected for a specific region.

This setting adjusts the sensitivity to detect motion. Choosing a low value for sensitivity will cause the motion detector to detect small changes in movement. This may be undesirable if small objects are moving in the background. Choosing a higher value for sensitivity will cause the motion detector to be more tolerant of movement in the image.
Also, network cameras may produce visual noise that may be detected on low sensitivity settings. Check the Show Motion Change box when adjusting this setting.
This status bar shows the level of detected motion in real-time. In the example, the % motion is 3.40% – which is greater than the set Threshold (see next item).
This setting determines when to take an action based on detected % motion. Setting this to lower values will trigger actions when small changes are detected (such as a bird flying by). Higher values filter out smaller objects and will trigger alarms when larger objects are detected. The arrow on this control corresponds directly with the %motion bar above. When the motion bar above passes the arrow on this control, an event will be triggered and, if setup, the camera will begin to record. See “Sensors/Events on the Web” and “Recording on the Web” for more information on Recording.
Here you can change the size of your brush to make it more exact when highlighting a Region of Interest. The highest brush size is 6. To highlight an area, click with your mouse where you would like motion to be detected. Right click and drag to erase squares.
4. Click "SAVE" then "GO BACK TO SETTINGS"
***Click HERE to learn how to setup Sensors and Events next***