Recording on the Web

NOTE: The drive where ALL cameras are saved to is set in the “Archive Tab” of the “System Settings” cannot be changed on the web. However, you can change where individual cameras save. 

Setting up your cameras to record: 

  • Under the “Settings” icon click on the camera you would like to setup recordings for from the column on the left. 

Recording Type

Video for this camera will not be recorded.

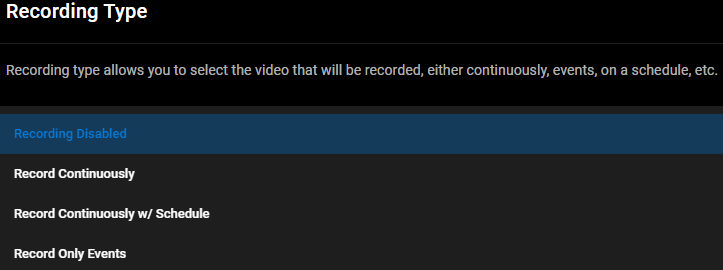
This mode will record all incoming video 24-7.  You can see the system is recording by looking at the recording icon at the top right corner. If it is a filled in circle this means it is recording. It will save video at the frame rate that you specify. If the incoming frame rate is slower than the specified recording frame rate, then video will only record at the incoming frame rate. This frame rate specification applies only to MJPEG video. Due to the nature of H.264, all frames must be recorded.

When this option is chosen, you will need to set up a recording schedule. If a schedule has not been set, you will be able to edit the schedule by clicking the “Edit Schedule” button.  When the schedule appears to highlight times drag and drop with your mouse to highlight times in green. To unselect times right click.  

Choose this option if you want to record video only when an event is triggered, such as motion detection. ***IF YOU SELECT THIS OPTION, YOU MUST SETUP SENSORS/EVENTS TOO. Click HERE to learn more about setting Sensors/Events on the Web***

Primary Drive

If “Default” drive is selected, then video will be saved to the drive specified in the Systems Settings. Say for example you want to save this camera to a different drive letter, such as a USB drive that you are going to use for this one camera. Here is where you will override the default drive, and choose the specific drive location.

Secondary Drive

In the ProPlus model or higher, you can select a secondary failover drive to record to if the primary drive is full or offline. 

Secondary Drive Use Options

Here you can choose to either have ViewCommander record to the secondary drive as a failover if the primary drive gets full or, if you have the ProAdvanced, model you can have ViewCommander write to both drives simultaneously. 

Record Audio

If your camera supports audio, ViewCommander can record audio too. To enable audio recording, simply check the checkbox.  You must already have audio enabled for this camera.

Event Recording Options

Under “saving a video when an event is triggered” you have the option to choose how soon you would like the system to start and end a recording when an event is triggered. The first option lets you save video before the event was detected.

NOTE: The longer you set this value, the more system memory ViewCommander will consume.

The second option sets how long to record video when an event is no longer detected.

« | »