The Sensors and Events allows for the setting of different types of events, such as motion detection or I/O port events. You can configure ViewCommander to handle events differently for each camera.
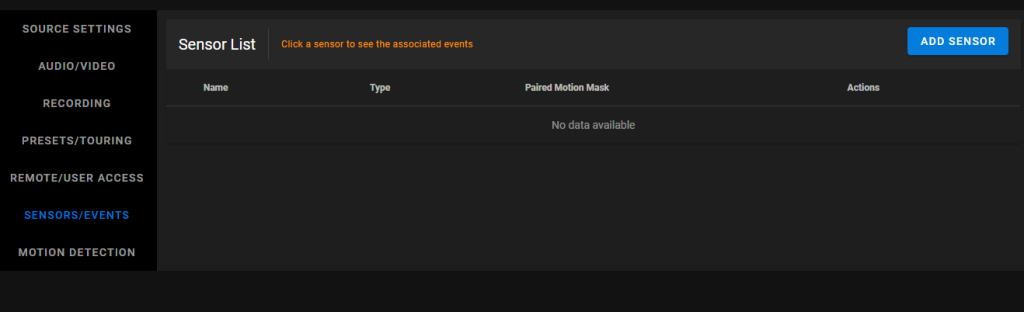
1. Click "ADD SENSOR"
Here you will be able to configure Sensors, Events and Event Actions
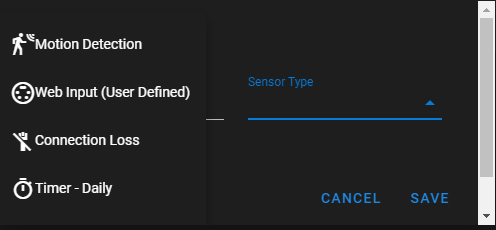
Sensors are used to detect specific events, like motion, connection loss, or I/O from the camera. To configure a sensor, press “Sensors & Events” then click the “Add” button in the Sensors section of the menu and select a sensor type. For Motion Detection sensors, you will also need to choose between analyzing the whole image, or a region of interest. To learn more about setting up Motion Detection click HERE
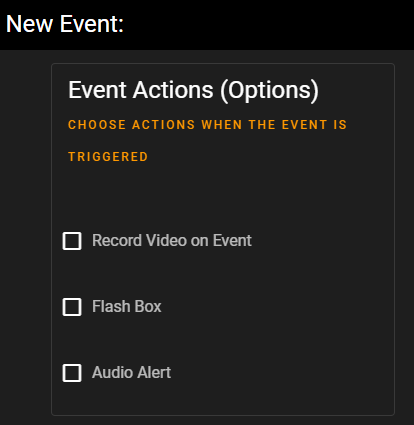
Each Event can be assigned a number of Event Actions, which occur whenever the event is triggered. The Event Actions are grouped into several sections for organization.
This option will allow you to set up Motion Detection notifications. You will need to have set up Motion Detection prior to selecting this option. Click HERE to learn more.
For some cameras in the ProAdvanced model there is the option to pull in custom controls. For example, if you want the camera to go into day mode when the sun rises.
Choose this option if you would like to be notified when there is an Input/Output connection.
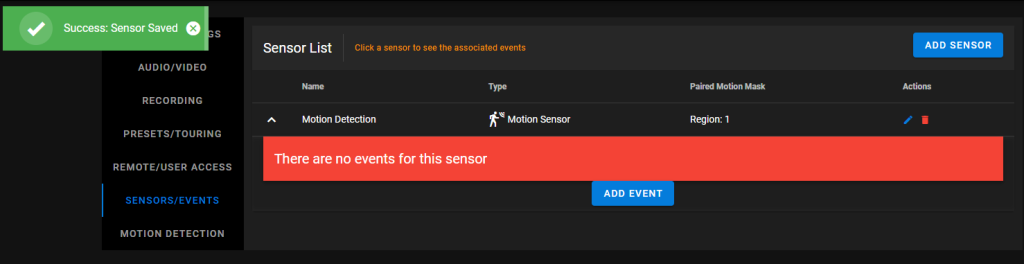
2. Click "ADD EVENT"
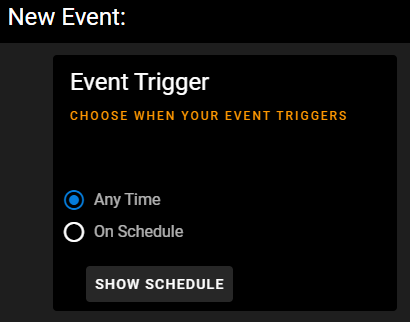
Each sensor can have multiple events, each with their own set of Event Actions. To configure an event, first choose a Sensor, then press the “Add Event” button. Each event has a user-specified name, and can be configured to be triggered either any time or on a specific schedule. Multiple events on each Sensor can be given their own individual schedules.
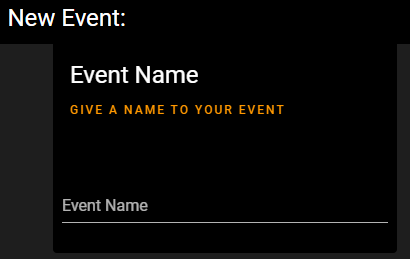
“Event Name”
This is where you will name your Event. For example “Motion Detection”
“Event Trigger”
If you would like the Event to only be triggered on a specific day at a specific time then you would choose “On Schedule” and setup the schedule under “Show Schedule”.
NOTE: This is still an “event” so when setting up recordings you still would select “Record only events”
Flash Box Checking this option will draw a red box around the video when an event is triggered. The Flash Box will also appear around a video feed when in MultiView Mode.
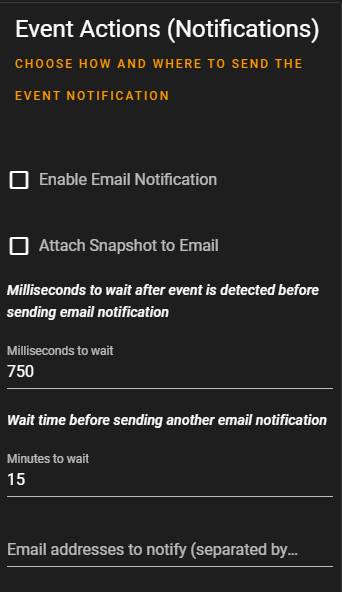
This value prevents sending too many email notifications within a period of time. This value will be the number of minutes to elapse before sending another email notification.
Use this field to add email addresses to send notifications to. This will override the default system email address. Use a semicolon (;) with no spaces to separate multiple email addresses.